Pokazywanie postów oznaczonych etykietą Tutorials. Pokaż wszystkie posty

Tutorial for Mixed Media Background / Kurs na tło mixed mediowe

Hello everyone!

I have for you today very quick and easy 
Tutorial for Mixed Media Background.
Last week La-La Land Crafts has launched a totally brand new line of rubber stamps.
They are perfect for a variety of projects, as well mixed media. 
For today's project, I have chosen Wood Rings.

Ok, let's start!
What you need:
rubber stamps Wood Rings
clear embossing ink pad
white very fine embossing powder
heat tool
aquarelle paper
brush
water
aquarelle paints
scissors
wipe
The first step is to stamp our wood background with embossing ink, apply a white embossing powder and heat up with a heat tool.
The same we do with small elements:
Next steps are up to your imagination. You can be very creative here.
You can choose your own set of colours matching to your future project.
I have chosen greens and fuchsia colours.

On the whole sheet, you apply water. Lot's of water :)
Then with a brush, apply your paints in random places, more like big stains.
Using heat tool dry whole area a little bit and access of water collect with tissue or piece of paper. 
When you happy with your background, using a brush, splash some dots around and dry with a heat tool and tissue.
The last step is just cut out everything and use it for your project!
Hope you like it and I have inspired you to make something like that :)
Thank you for your attention!
Have a good day!
Kisses!

Pop-up Valentine's Card Tutorial

Hello everyone!
Henryka here today with a Pop-up Valentine's Card Tutorial.
I will show you how to step by step make a Valentine's Card 
for someone special to your heart.
We are going to use papers, shapes and sentiments from December 2017 Card Kit.
You can buy it now for just 36.50$!!!

First, you need cut a card 20 by 15 cm.
You score it on longer side halfway through the page.
 Fold your card in half.
On the bending side of the card, you measure distances as in the picture.
Make cuts as in the picture.
Now you need to make score lines. See picture below.
This is how the centre will look when folded in half.
Put the card back in half and measure distances as in the picture.
Make cuts as in the picture.
Make score lines.
View of the inside of the card.
Put the card back again in half and measure distances as in the picture.
Make cuts as in the picture.
Make score lines.
The final view of the centre of our card.
Now, you need a base for your card. From white paper cut a piece of 15.5 by 20.5 cm.
Score in halfway through the page.
You need to attach your inside of the card to the white base. You can do it with a glue or double-sided adhesive tape. It's up to you :) 
The inside of our card is ready and we can start the nicest part - decorations. 
I have used shapes and sentiments from December 2017 Card Kit.
You can, of course, use anything, cut out elements with metal dies, coloured images etc.
I have attached all my elements with glue like that to keep a 3D effect of my pop-up card.
Here is a front of my card. Decorated with papers and sentiments from December 2017 Card Kit.
That's all! Our Pop-up Valentine's Card is ready!
Hope you will try to make your own Valentine's Card!
Thank you for your visit!
Have a lovely day!

Layered Christmas Card / Warstwowa Kartka Świąteczna


Hello dear!
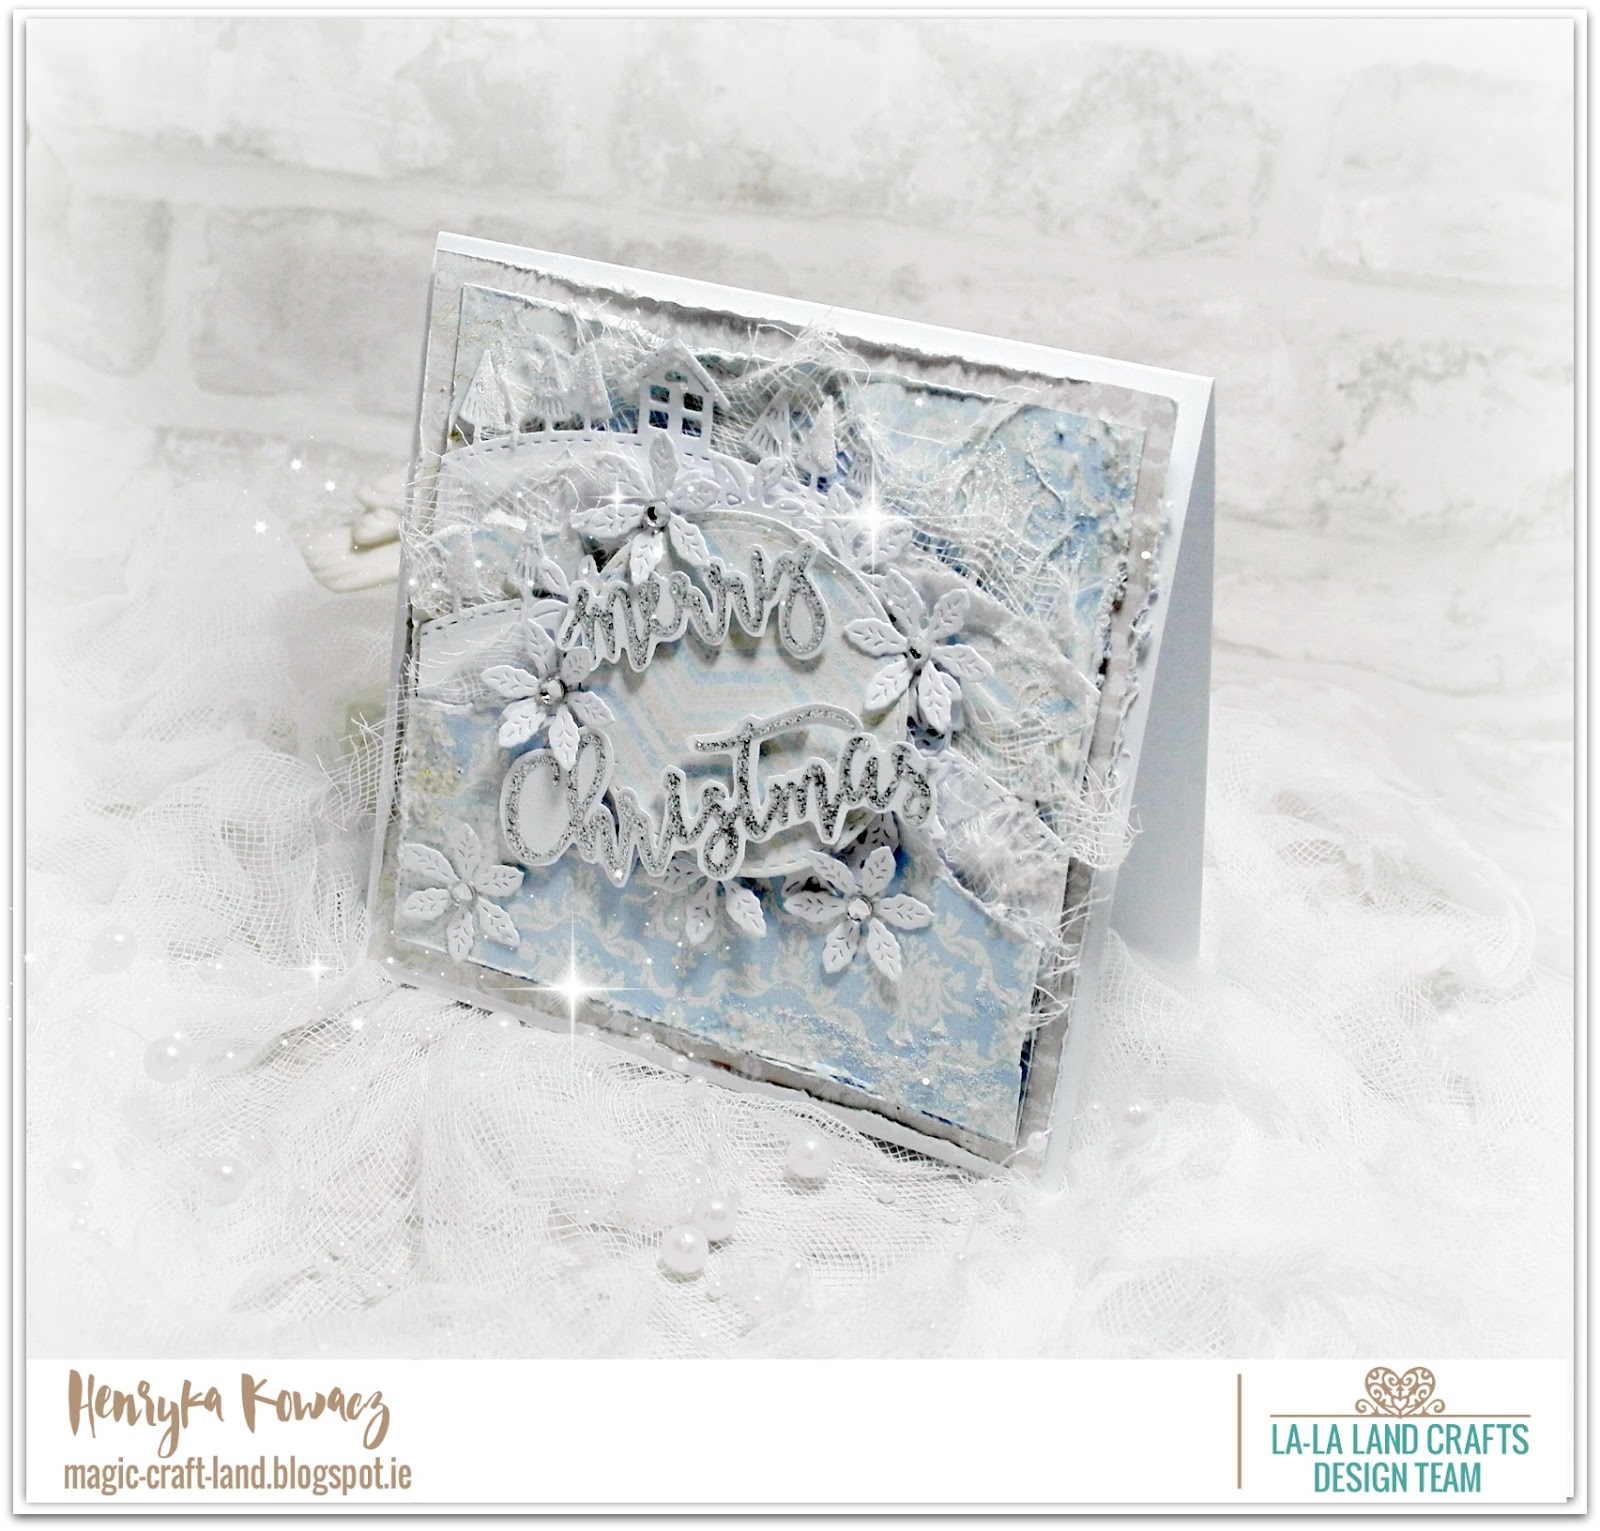
Henryka here. I will show you today how to make a Layered Christmas Card.
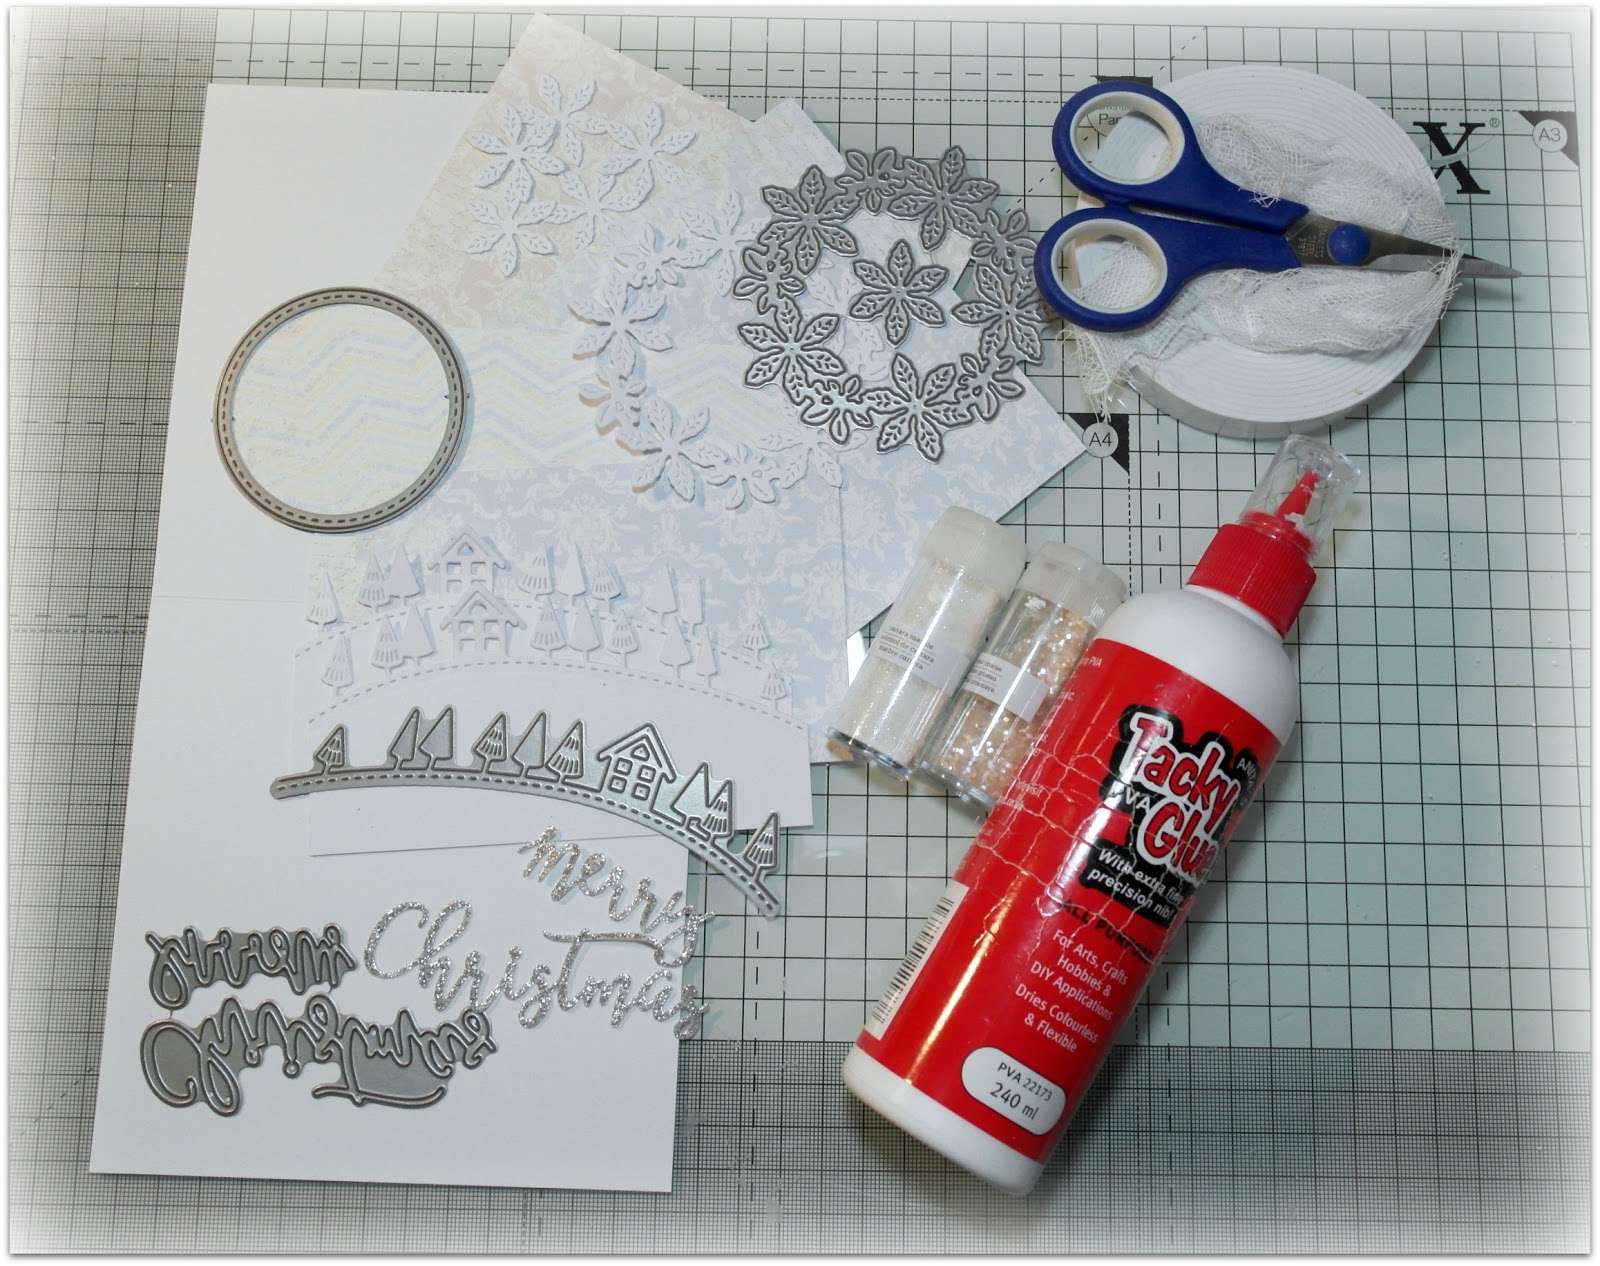
You will need to make it:
* white card for the base - size 11' by 5 1/2 '
* design paper (beige colour) - size 5 1/4' by 5 1/4'
* design paper (blue colour) - size 4 7/8' by 4 7/8'
* 2 x piece of design papers - size 3 1/4' by 4 7/8'
* 2 x winter hill border cut from white paper size approx. 3 1/4 ' by 4 7/8'
* 1 x white poinsettia wreath
* 5 x small poinsettias of poinsettia wreath
* circle cut with stiched nested circles - one to match the poinsettia wreath
* glue
* distance foams
* scissors 
* white gauze
* glitter 
First, the two the biggest pieces of design papers you need to distressed, 
I do it with my scissors.
Then you glue them to your base, first bigger and next smaller.
Your two smaller pieces, size 3 1/4' by 4 7/8', you need to distress as well, 
and one longer side you need to be torn.
Next, you layer those two pieces, alternating with winter hill border and white gauze.
The last layer you attach with distance foams.
Attach white poinsettia wreath to the centre of your composition and with distance foam, matching stiched nested circle.
Merry Christmas cut from an Adhesive Vinyl Silver Glitter you glue on white card and you cut around with margins.
You attach sentiment to your card with distance foam.
Attach 5 small poinsettias of poinsettia wreath, you can put them where you like to have a nice composition. Lastly, apply glitter on your card to give some frosty look.
And the Layered Christmas Card is ready.
Hope you like my step by step tutorial and you will try to make a card like this.
Have a lovely day.
Kisses!
Szablon dla Bloggera stworzony przez Blokotka